
data-animation-override>
“Airbrushing is a true art form, but have you ever wondered what goes into creating a great automotive work of art?”
When we think of airbrushing, most of us think of some kind of creative artwork painted on the side of a car. Back in the late ’70s and early ’80s, when vanning was all the rage, these large canvases on wheels provided the airbrush artists with plenty of space to create some kind of artistic artwork for all to admire.
Murals and flames were taken to a new level in the ’90s, with the airbrush being used to create shadows and shading on flames to give an almost 3D look. The murals moved away from the stencilled look to a more freehand style.
In recent years, the look of the traditional flame job has changed dramatically with the tribal style of flame and the introduction of ‘true fire’, a look that resembles exactly that — true fire. The creation of true fire revolutionized the entire industry and is a highly sought-after technique and effect.
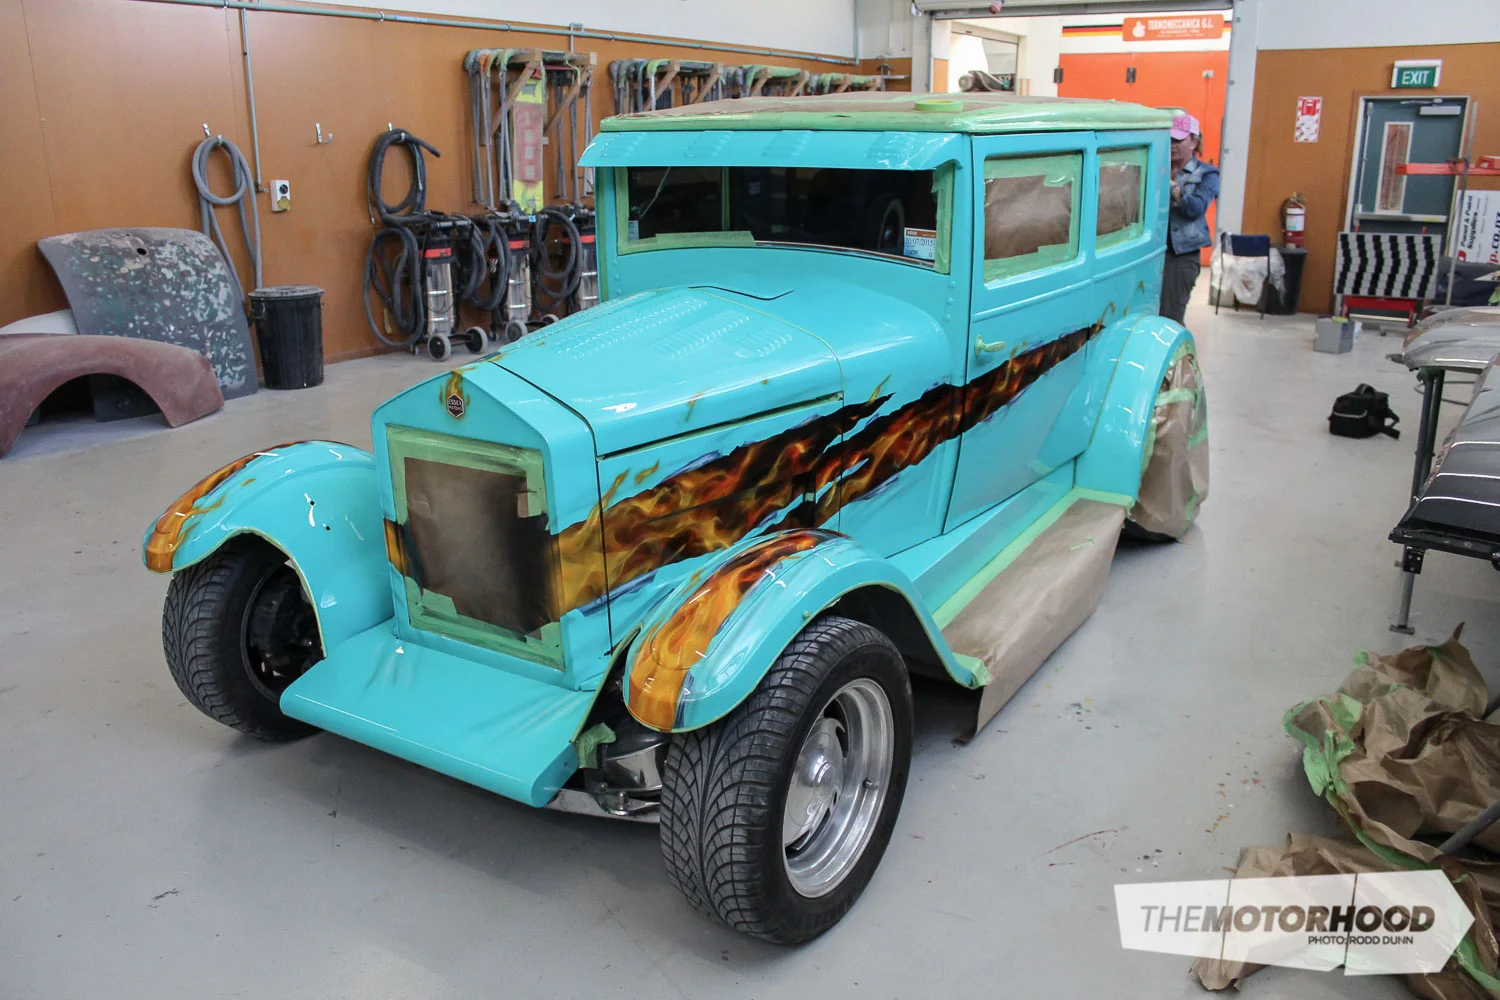
The creator of this effect, Mike Lavallee of Killer Paint, hails from Snohomish, in Washington, USA. He runs a very successful business applying his skills to whatever his clients require. This can be anything from helmets, fridges, and bonnets right up to full vehicles. Mike also travels the world, teaching his skills to other airbrush artists. While he was on a recent trip to Christchurch, we were invited into the booth to witness Mike weaving his magic on Amber Raudon’s ’26 Essex. Here’s what we saw:
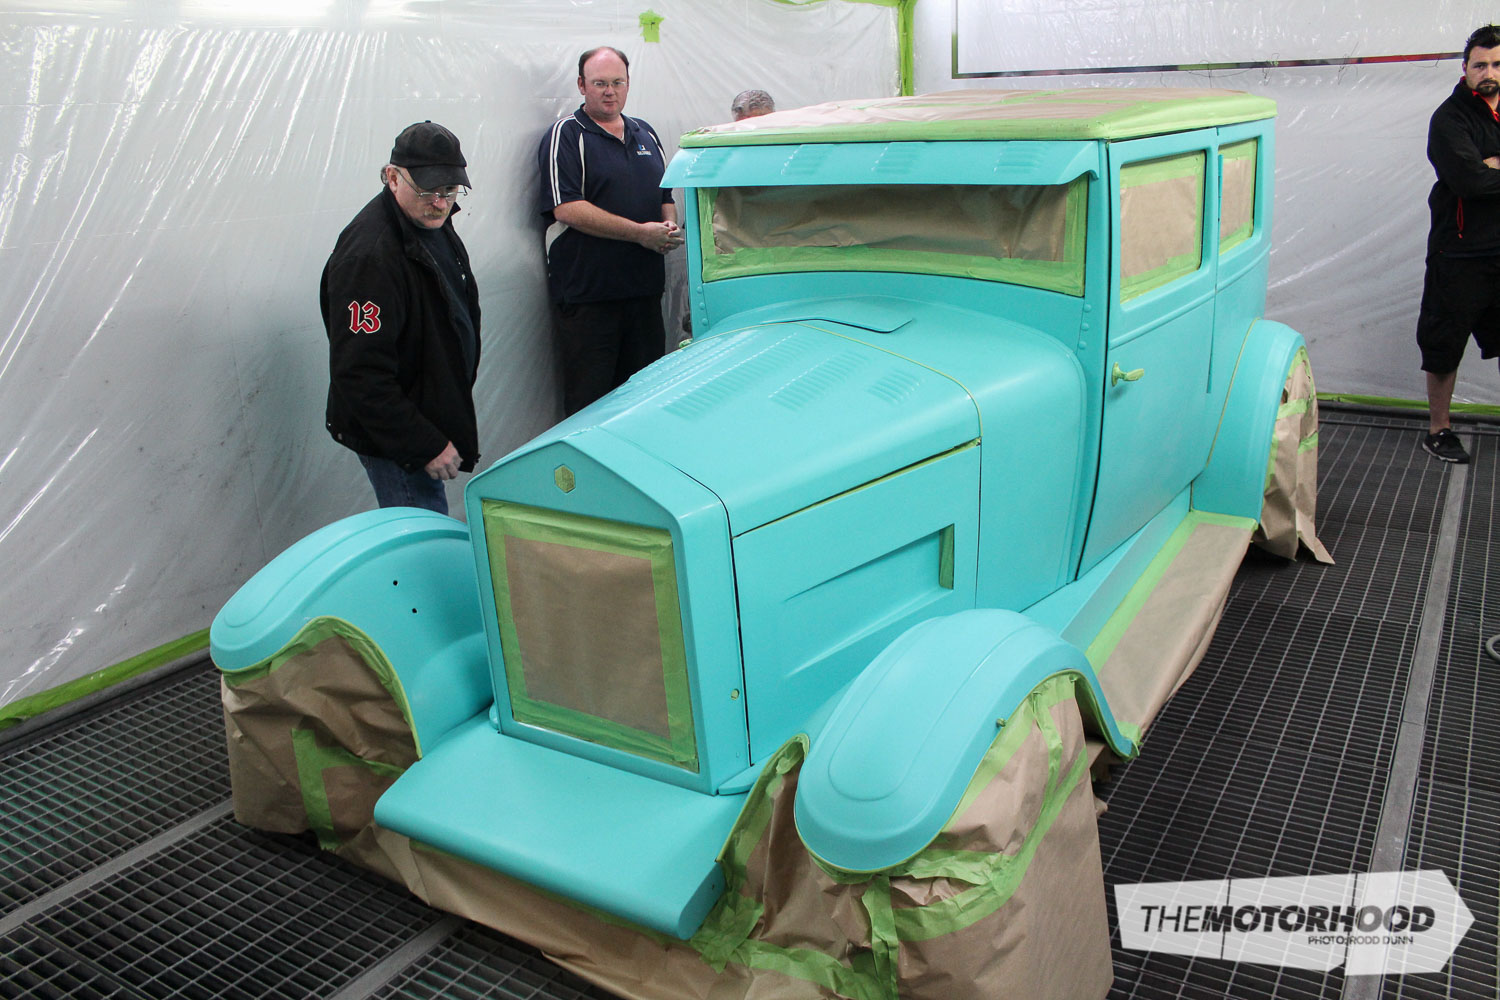
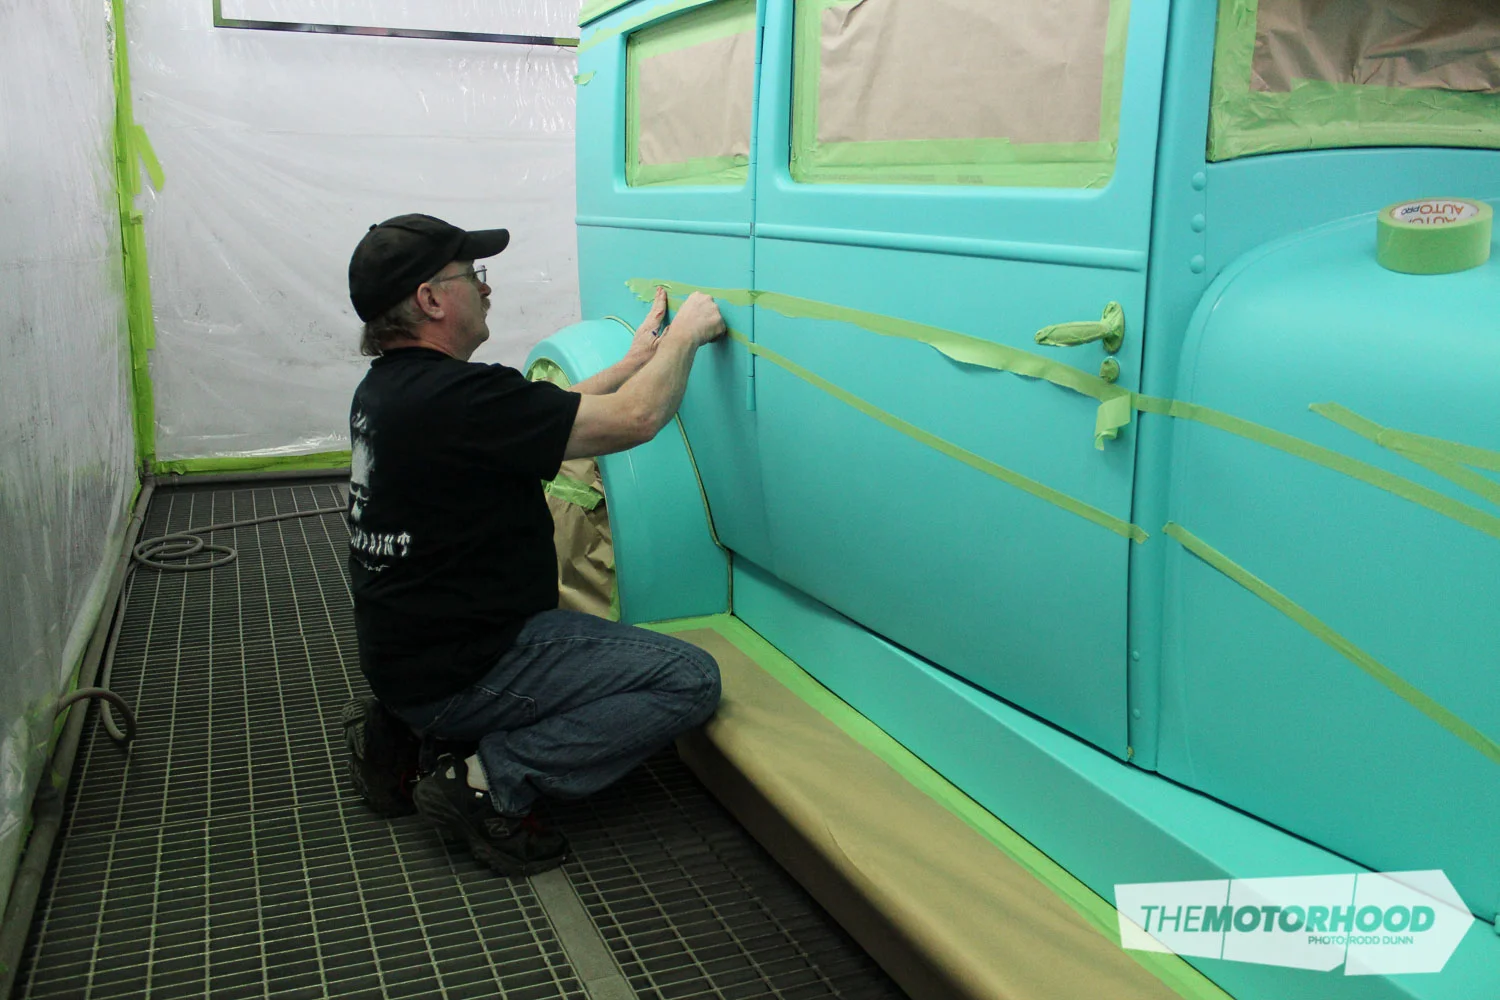
Step one
Once the car has been prepped and put into the booth, Mike likes to walk around the car to visualize the layout of the graphics. Because each car is different, Mike says that the car itself suggests how best to lay the graphics out.

Step two
Once he has the idea in his head, Mike sets about laying out the tape. This can be a time-consuming process, but it is this point that is make or break time. If you get it wrong here, the overall look won’t be pleasing to the eye, and certainly won’t complement the shape of the vehicle.
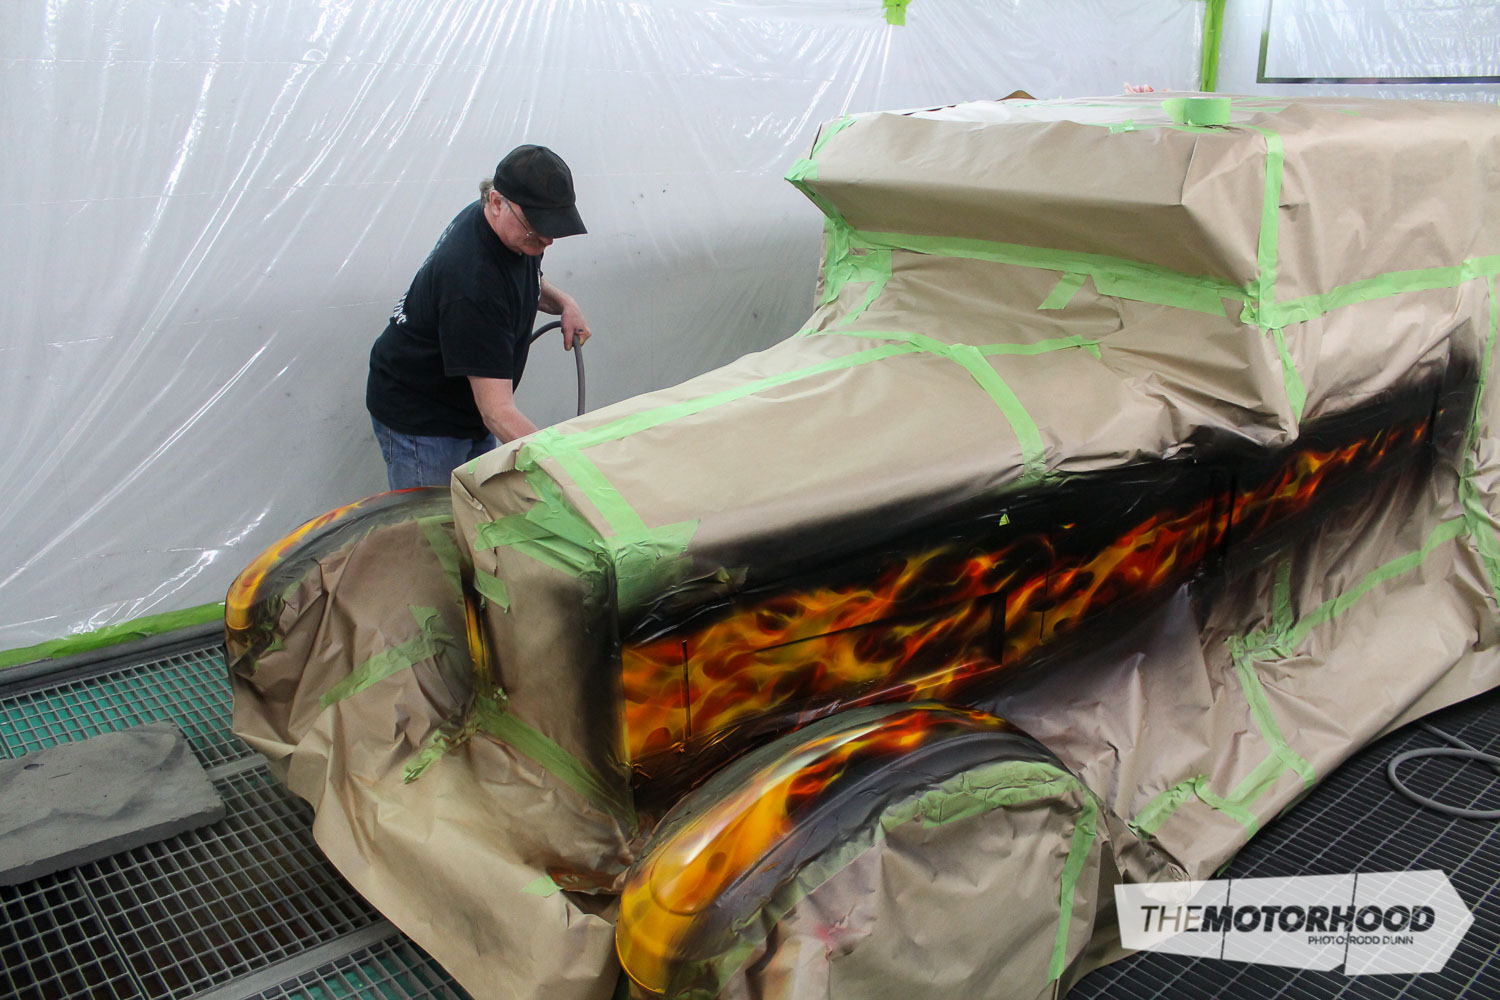
Step three
Mike decided to go with the look of metal tearing away, exposing the fire beneath. To create the jagged edge of ripped steel, the masking tape is applied, then torn lengthways to give the rough edge he is after. The rest of the vehicle is then covered to avoid overspray.

Step four
Mike moves into the mixing room and prepares all the paint for the job. In this case, a range of solid colours and candies was mixed from DNA Custom Paints, which is an Australian-made product.

Step five
Now that the paint is mixed, Mike starts applying black, to give the fire a background, and also to make it appear as though the fire is coming from within the engine bay.
Step six
Starting with the darkest colour, red, the first of the flames is applied. It is at this stage that it helps to know how the end product will look, as the red forms the base for the other colours to flow over. Having been doing this work for many years, Mike makes it look easy.
Step seven
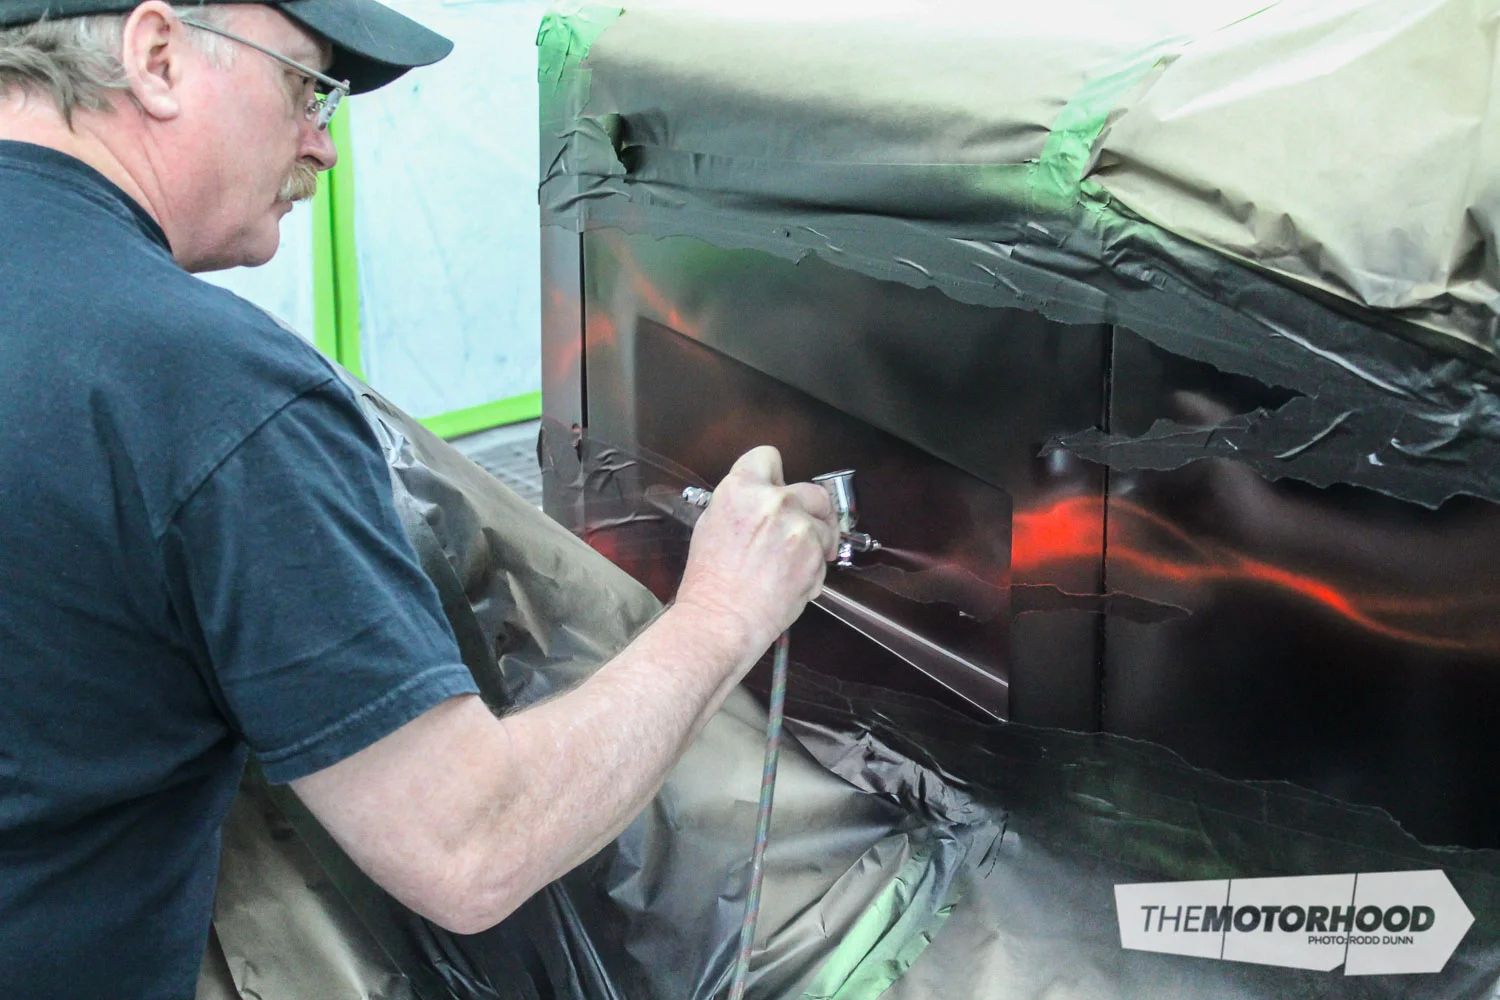
After the red has been applied, the flames are lightly coated with red candy, which helps the fire to ‘pop’.
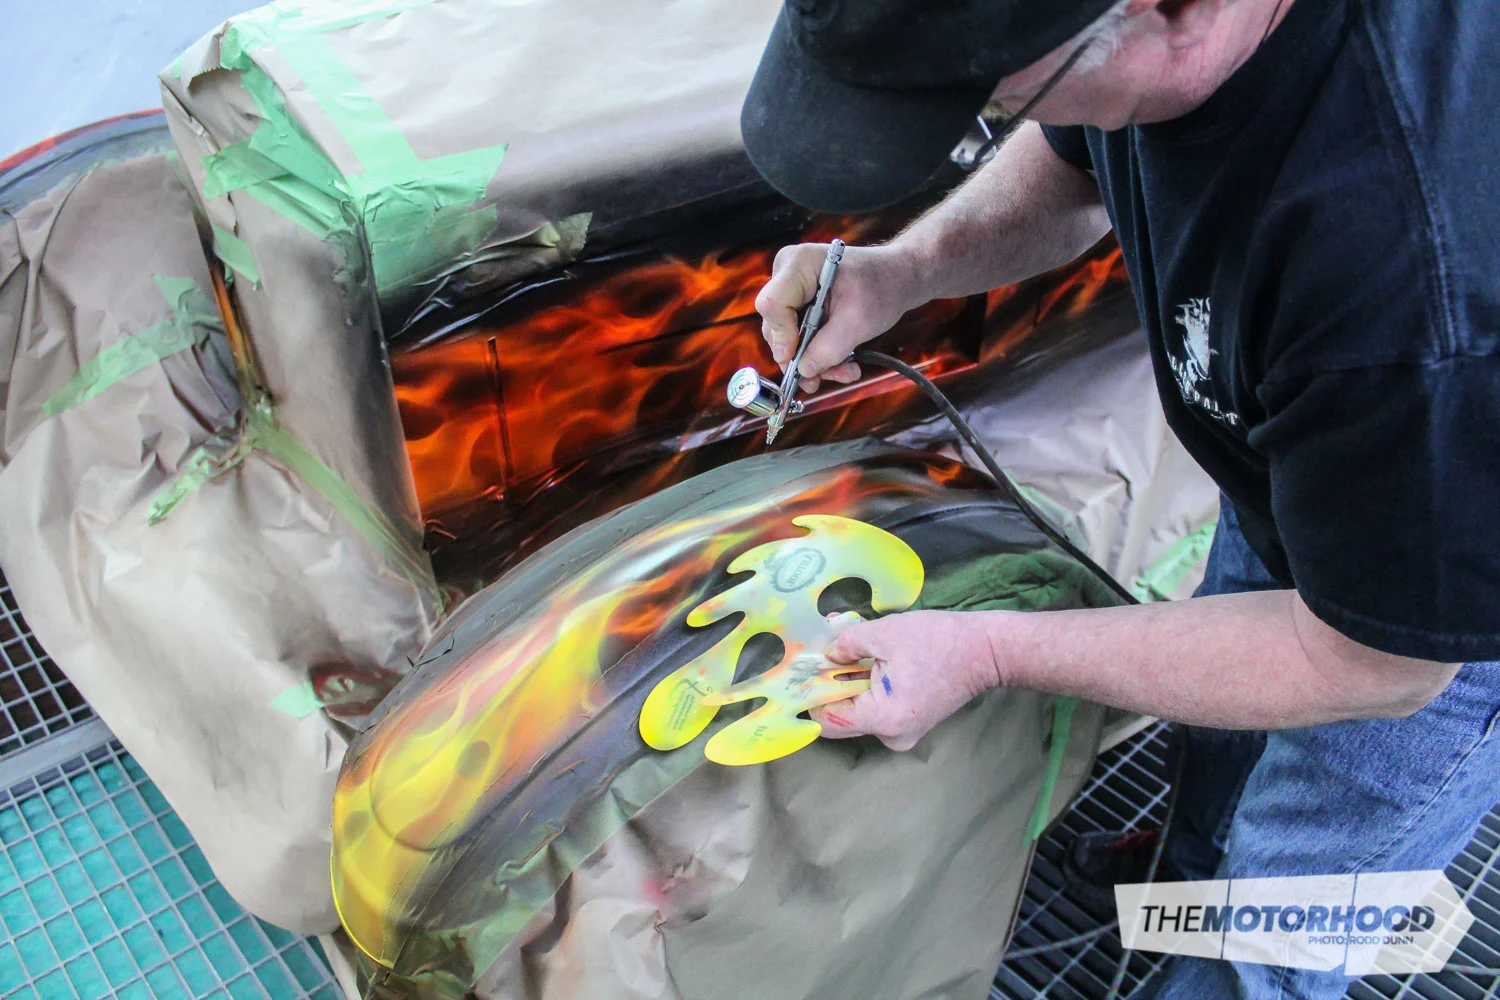
Step eight
Orange fire is now added freehand. Once completed, it is coated with candy, in orange this time.

Step nine
Mike now starts adding the yellow, both with a stencil and freehand. It is at this point that the flames start to take on a realistic look.
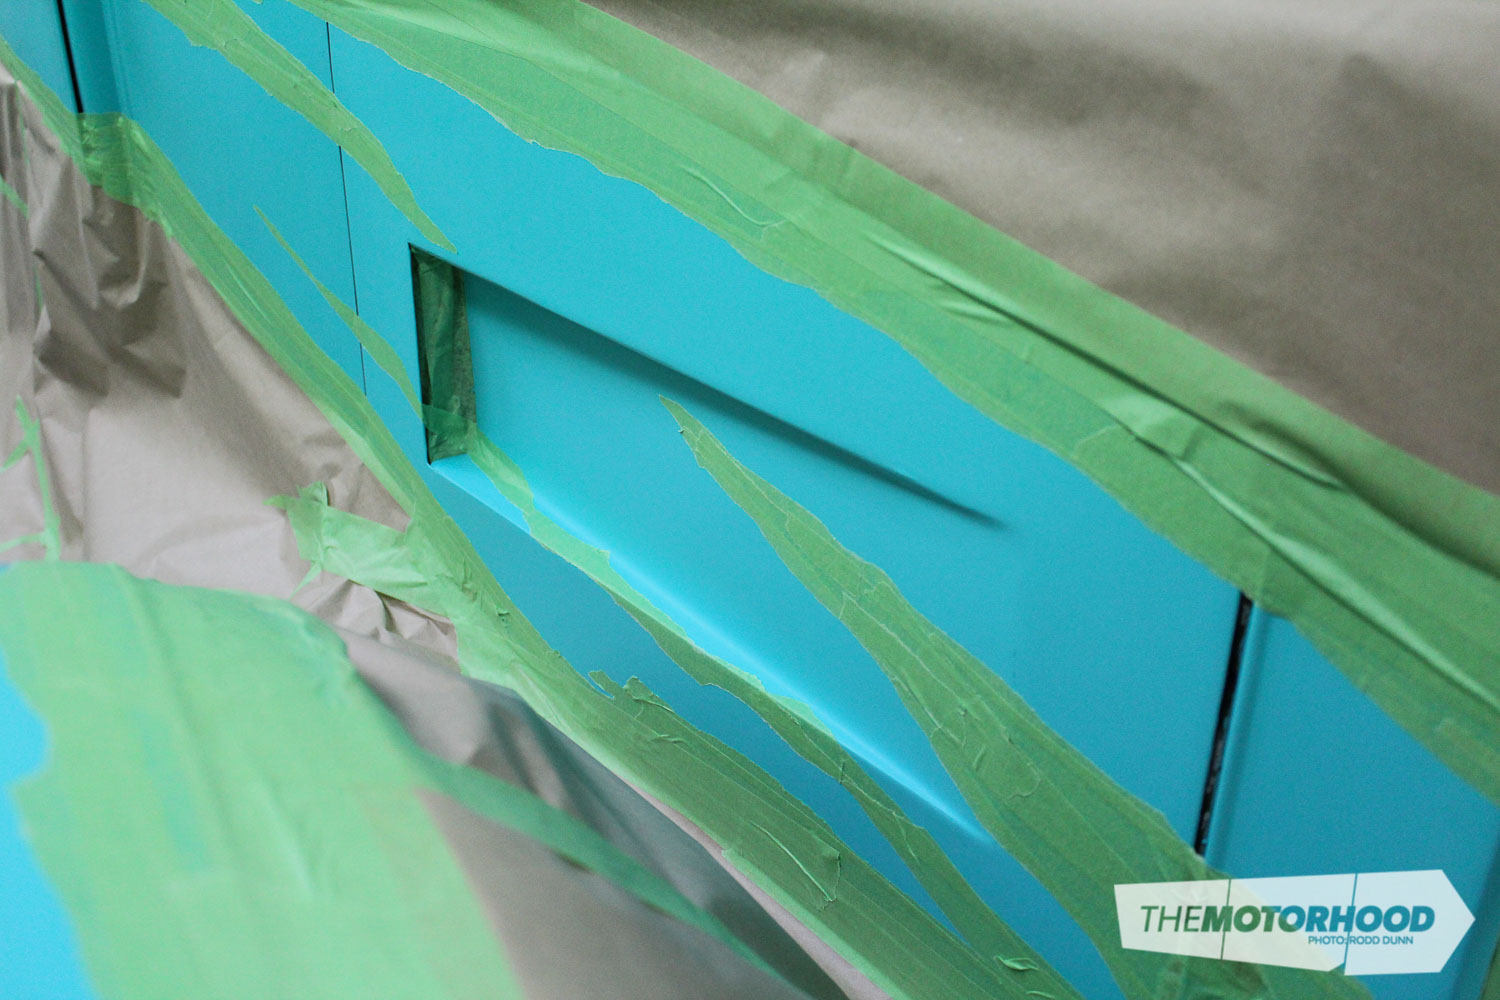
Step 10
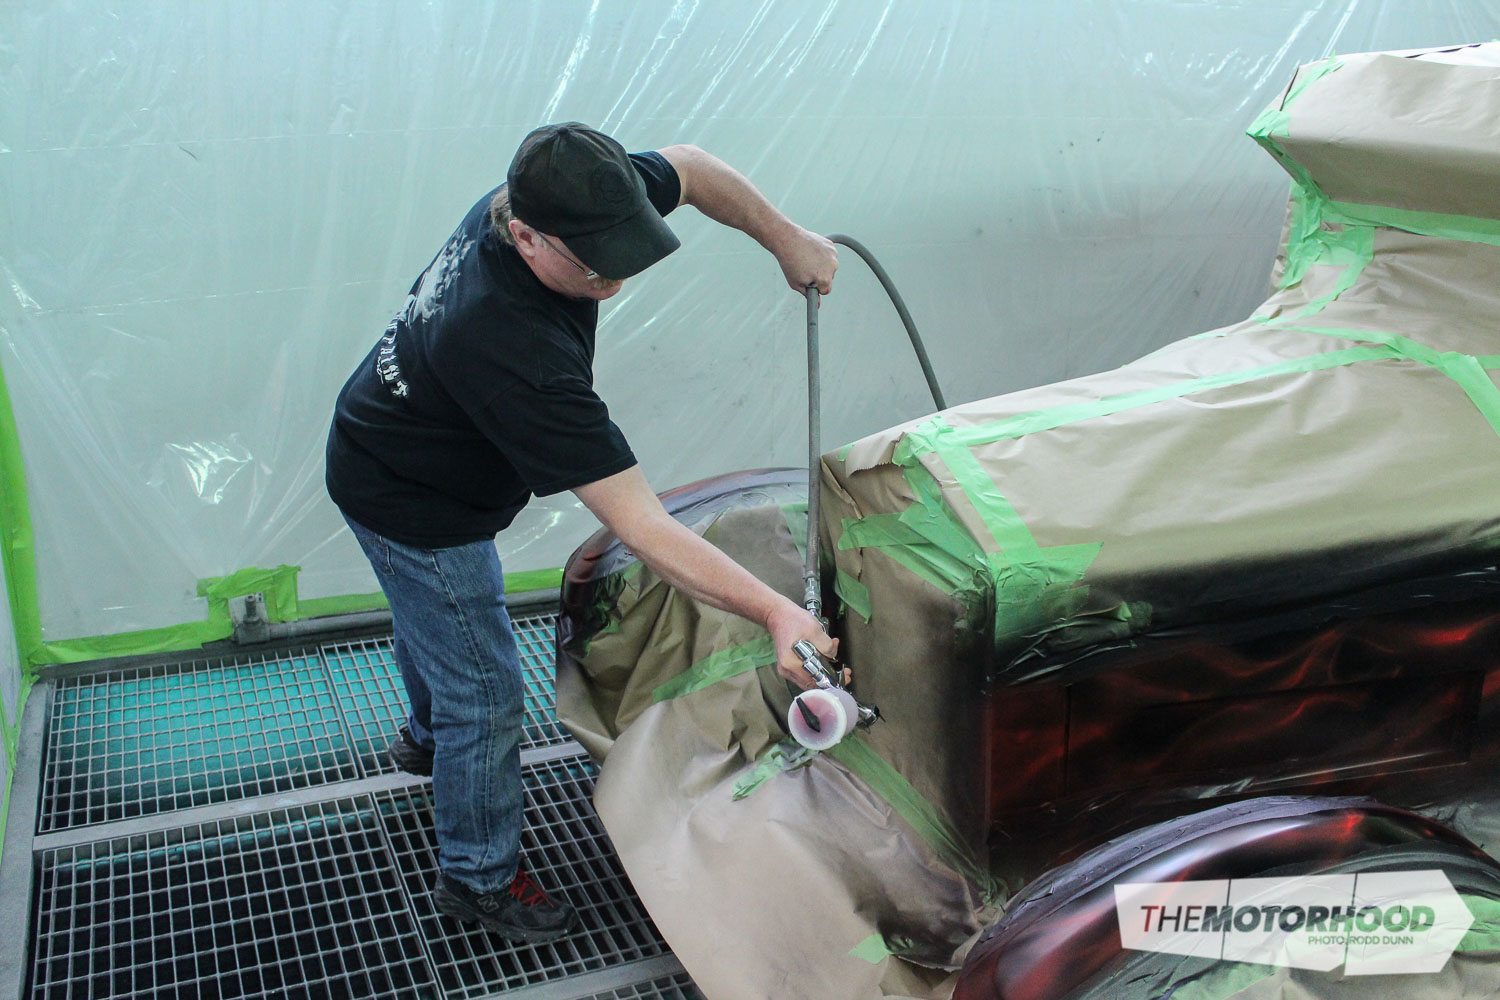
Once that is done, Mike hits the yellow with a coat of orange candy. In this photo, you can see the difference between the area that has had candy applied and the area still to be done.

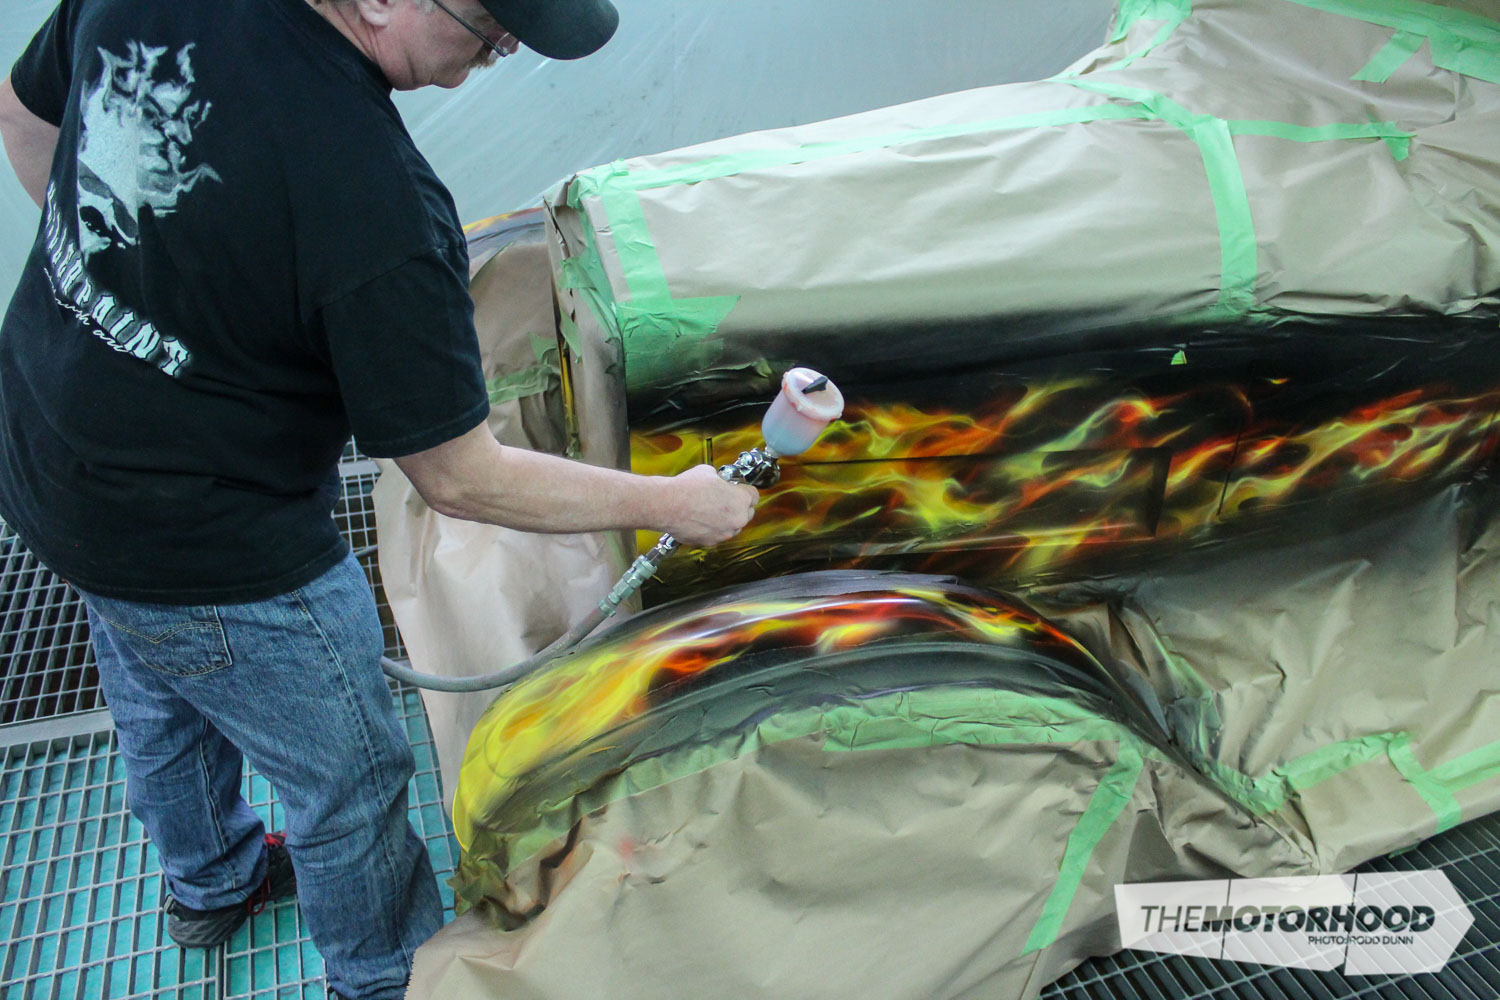
Step 11
After Mike applies more yellow fire, the flames are coated in yellow candy.
Step 12
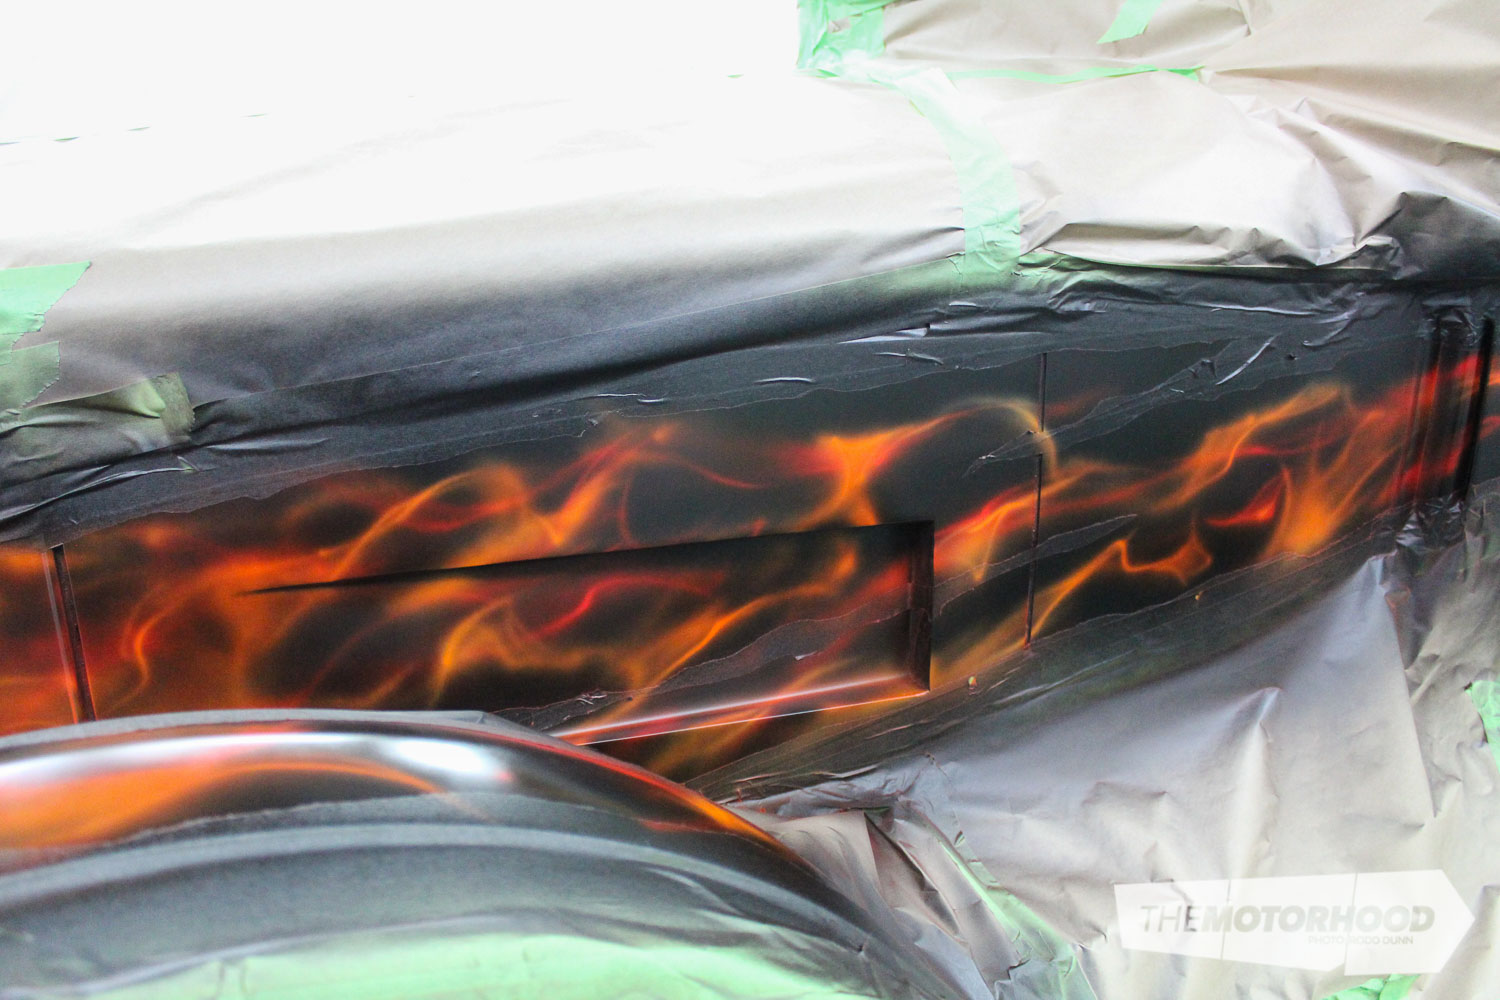
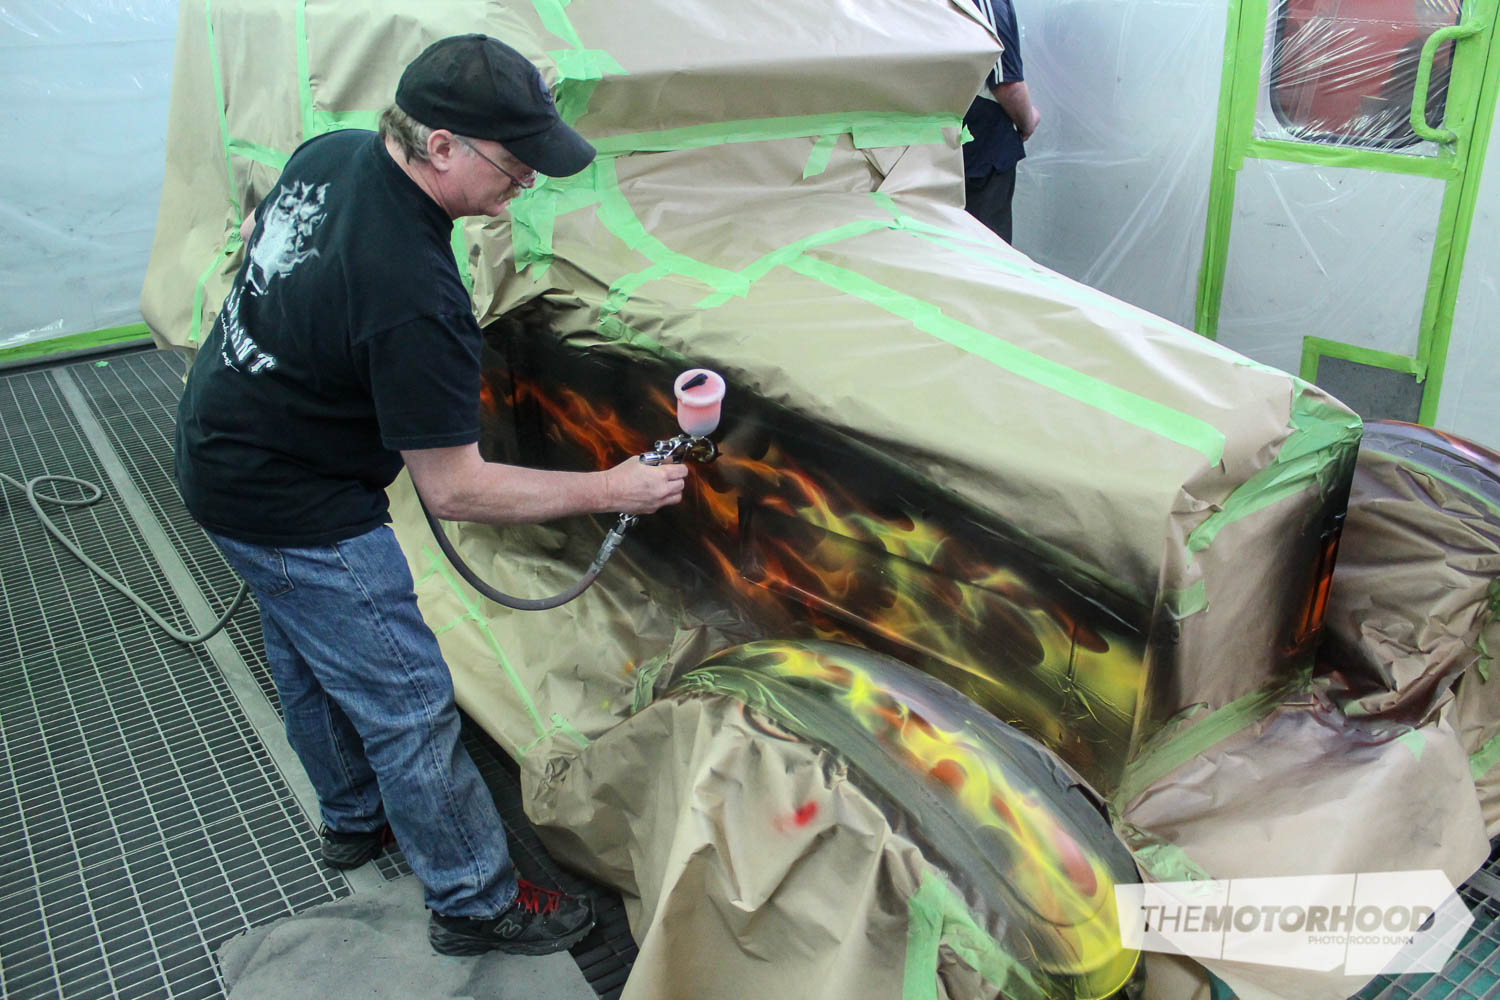
Now we can see the true fire coming alive. With the application of so many different layers, spray dust can become an issue, so Mike uses a tag-rag between each colour to ensure that all dust is removed.

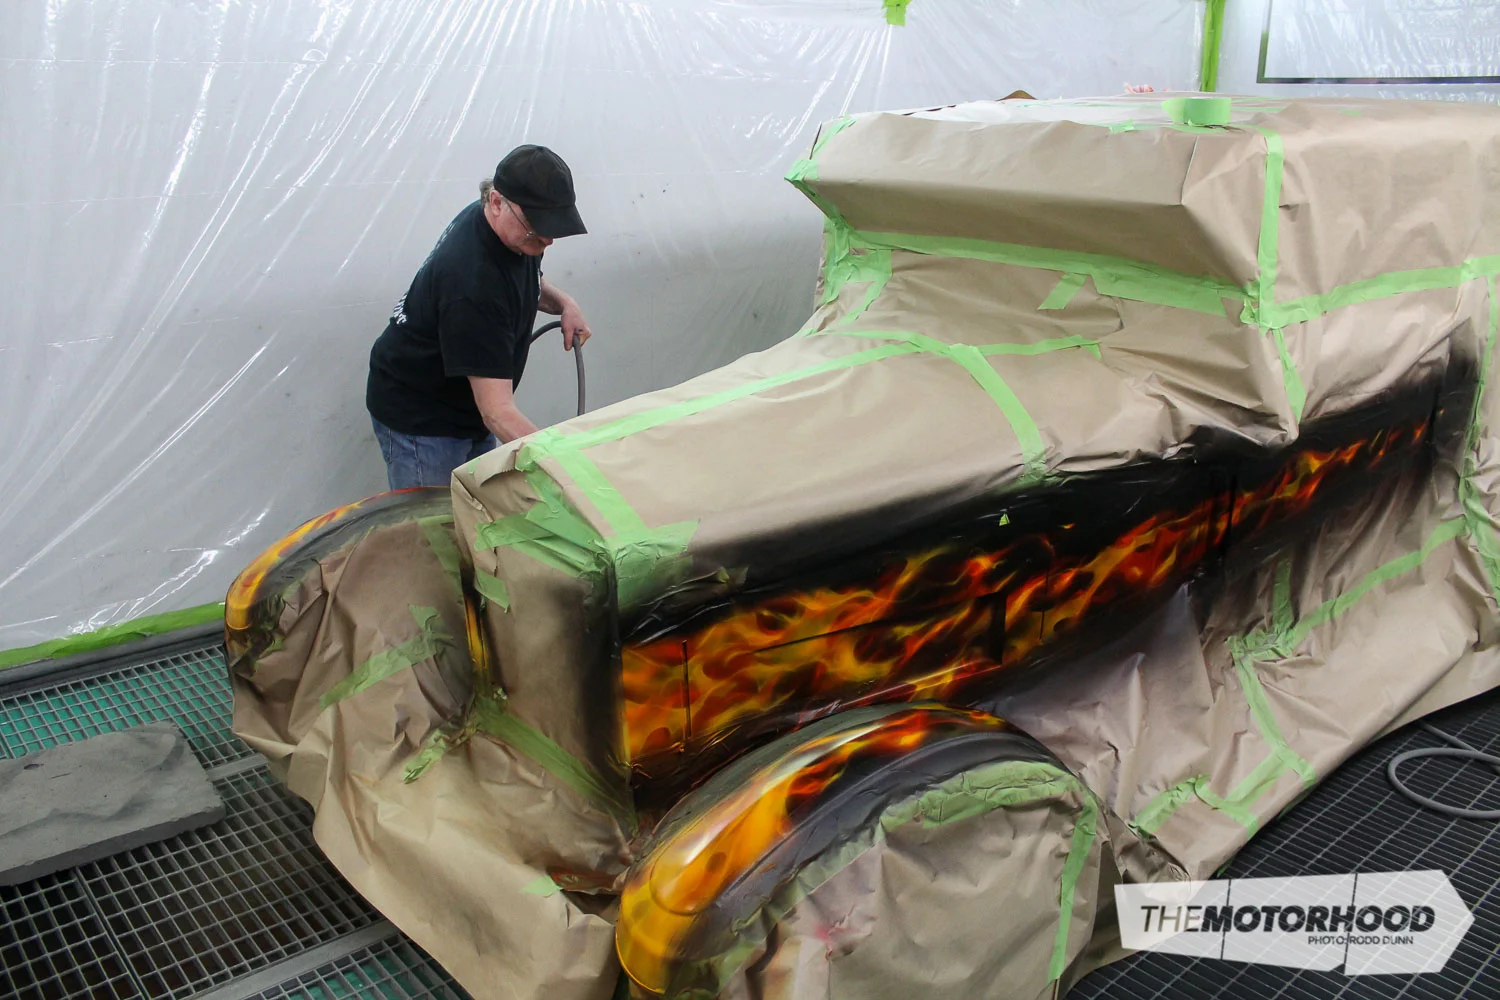
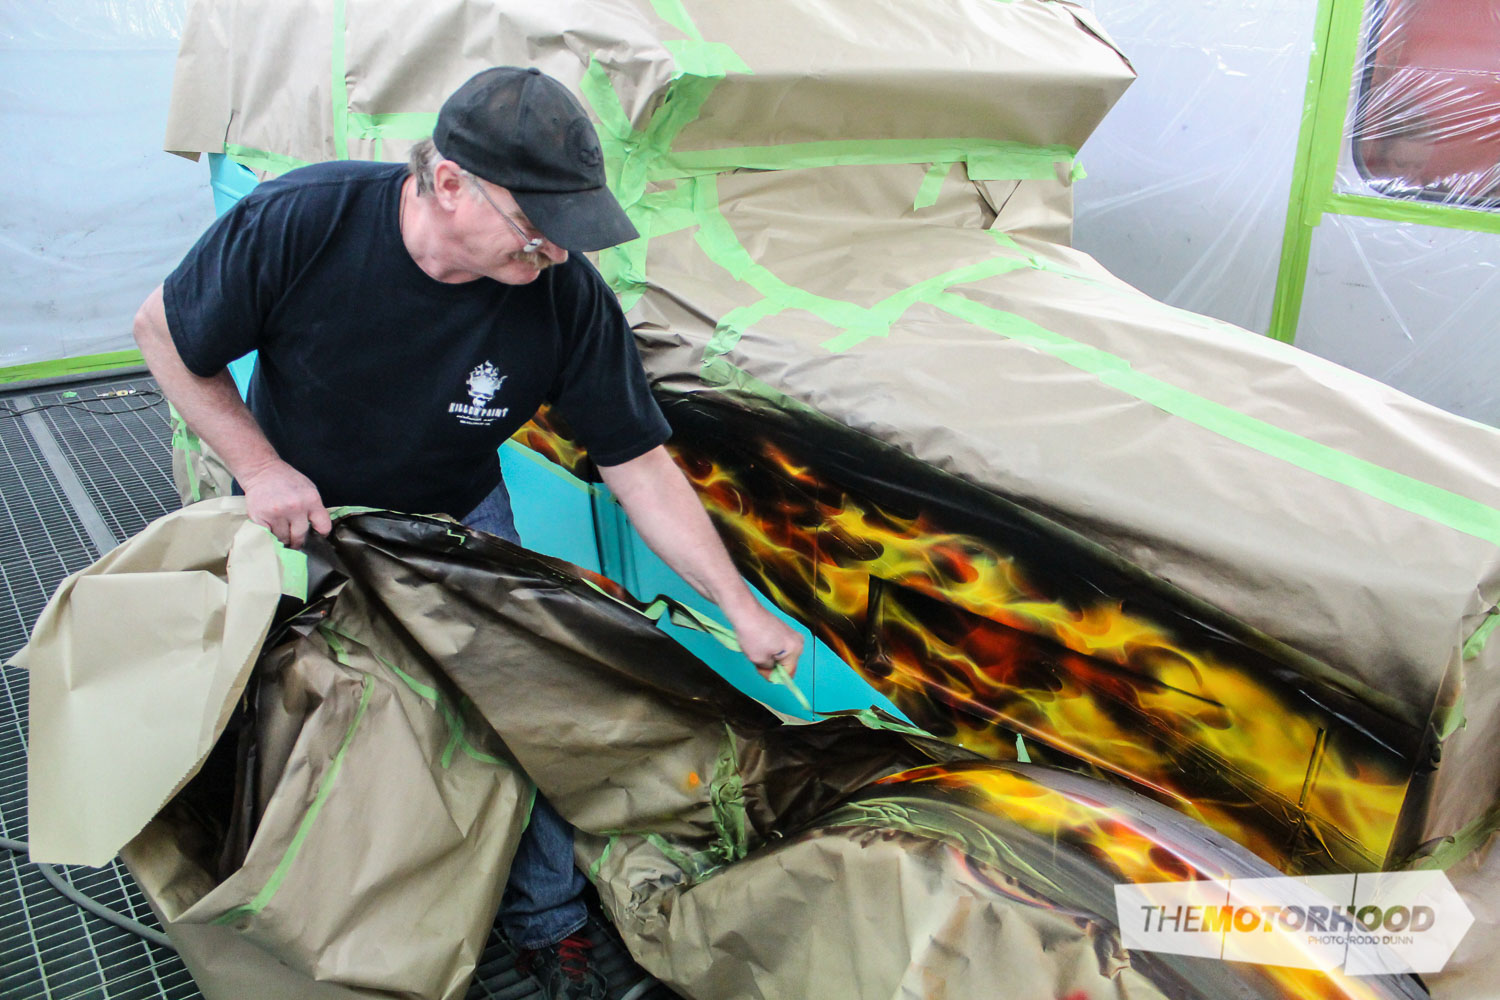
Step 13
Once Mike has finished with the colour and given the car the once over, the graphics are unmasked to reveal the fire.
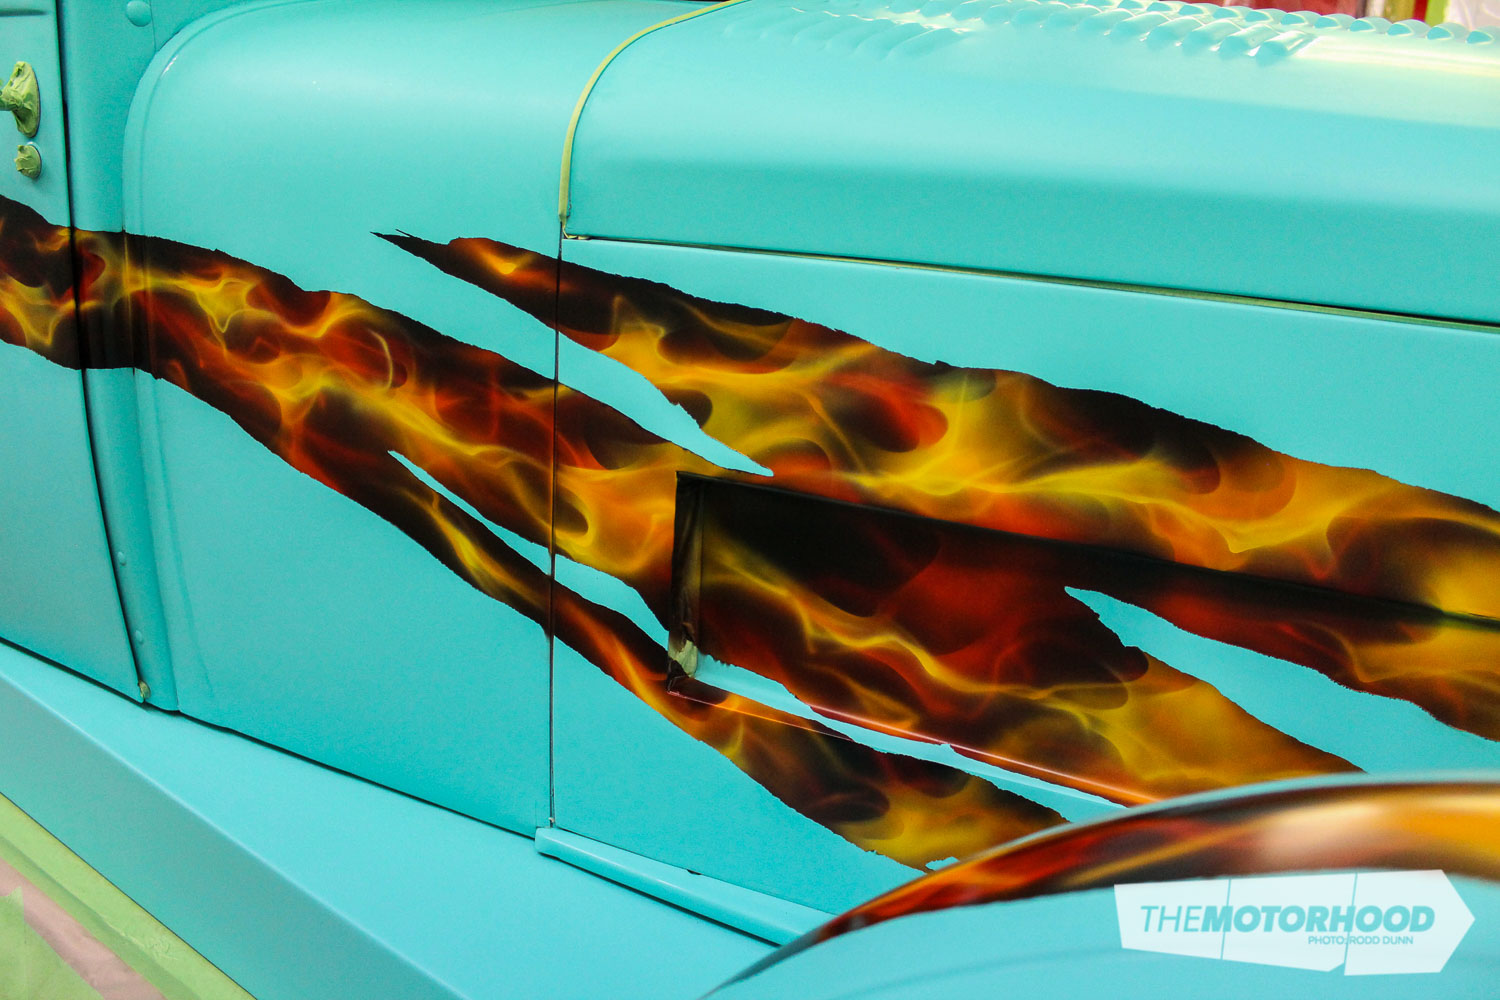
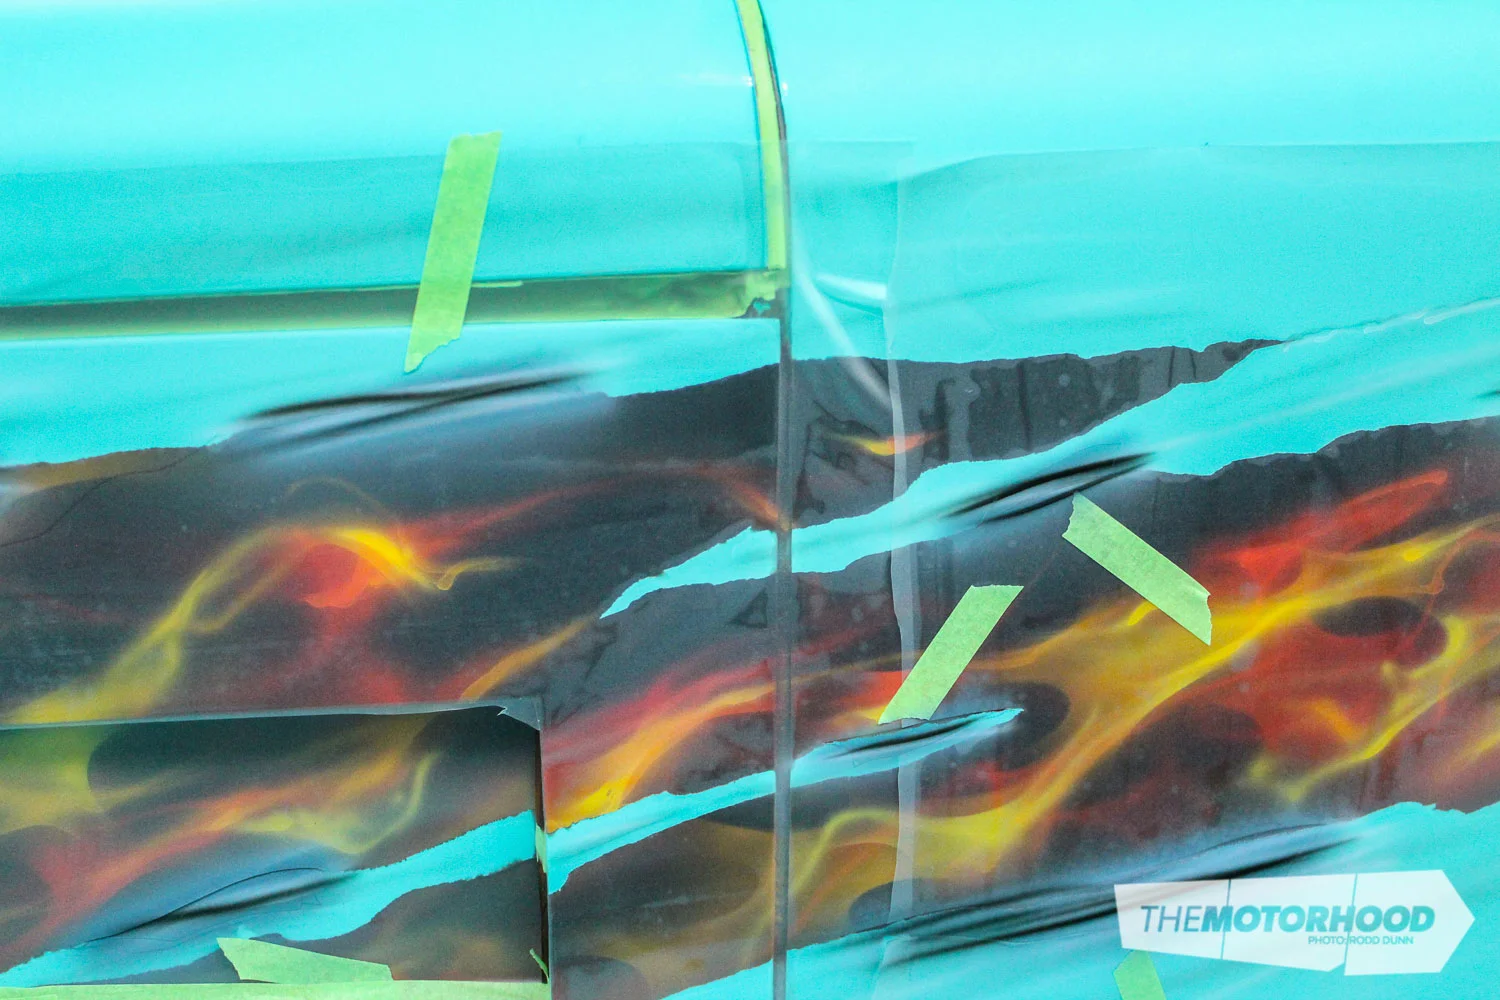
Step 14
Here’s how it looks unmasked.
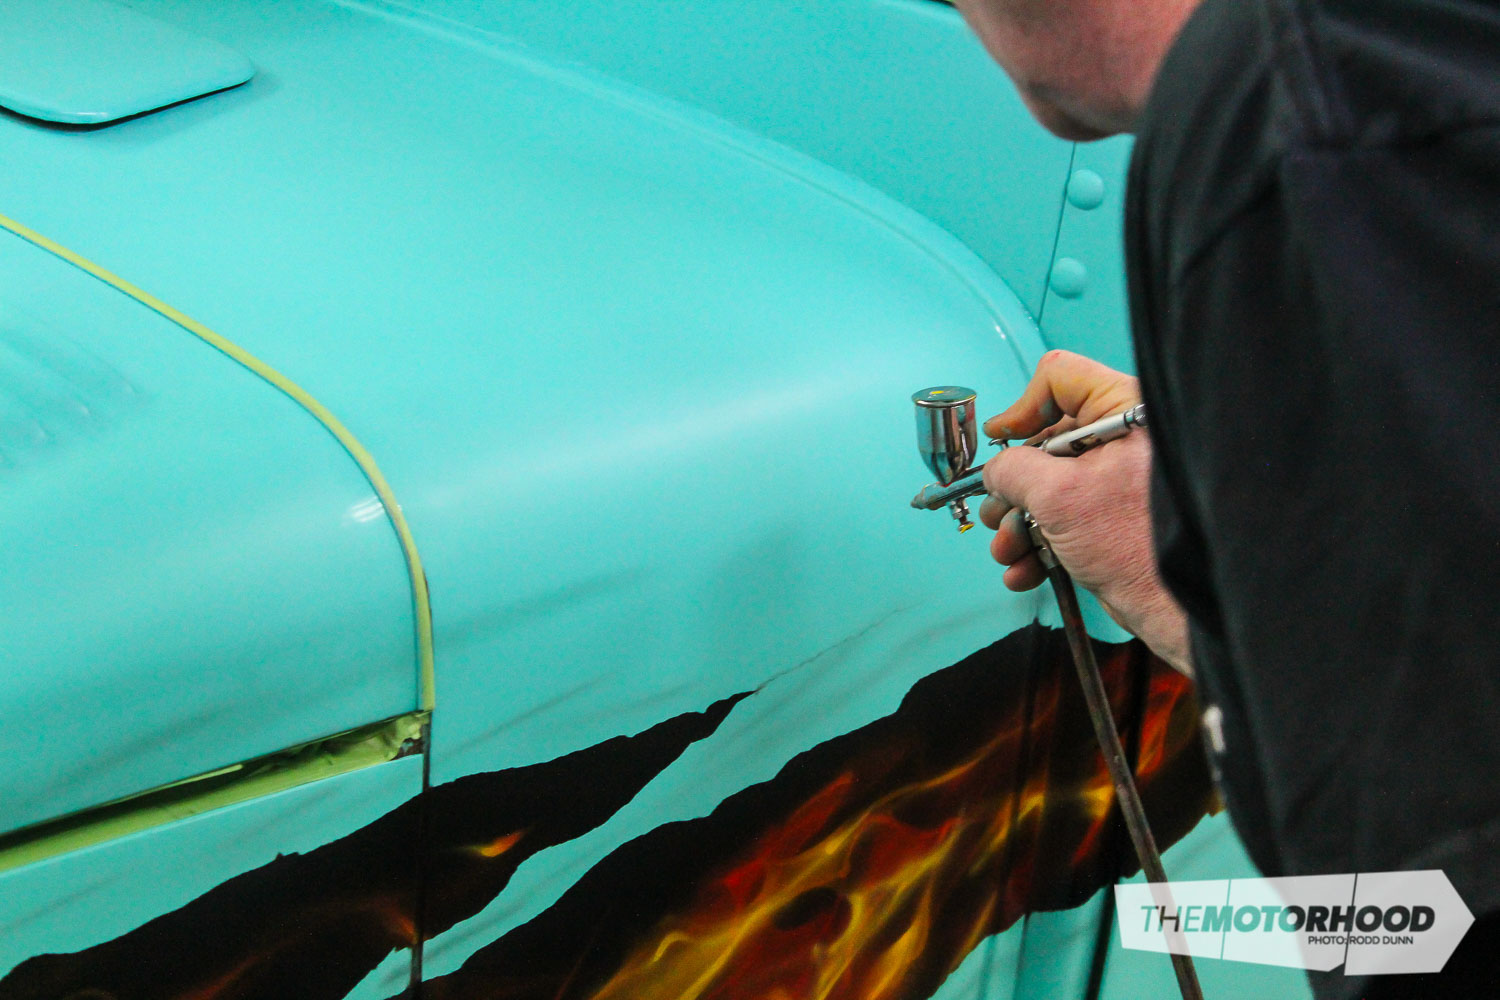
Step 15
To give the impression that the metal has torn, causing it to ripple, Mike adds some shading.

Step 16
After applying some low tack clear application tape over the fire, Mike marks out where the metal shreds, or folds, are to be, then cuts them out with a sharp blade.

Step 17
Paint is now applied to the cut-outs to give the impression of light hitting folded-back steel. The tape on the clear film helps Mike locate the cut-outs, as they can be hard to see.

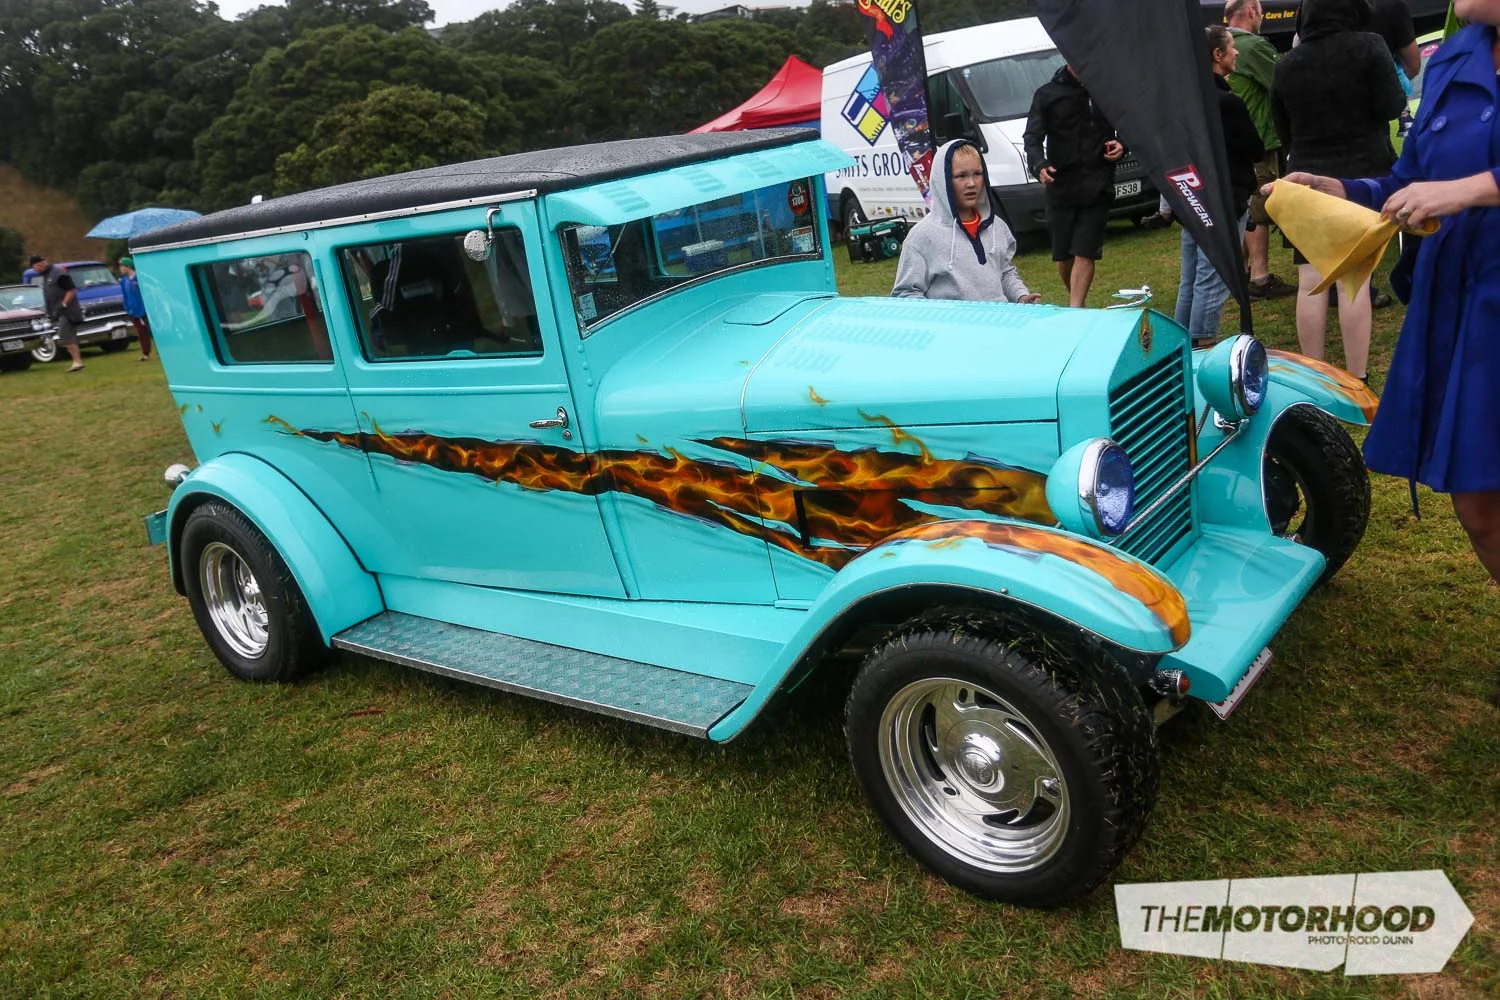
Step 18
This is the end look, once the film has been removed and some shading applied.

Step 19
Once the final touches are done, the car is clear coated — in this case, by Robert Duff of the Southern Institute of Technology, who helped Mike prep the car. After a good cut and buff, the car will be ready for pick up.
There you have it. After a day in the booth, another work of art hits the street — created by a true master. If you think your ride could be taken to the next level with some airbrush art, why not check out some local talent in your area. Who knows, it could be your ride gracing the streets and looking like it’s on fire.


This article originally appeared in NZV8 Issue No. 121. You can pick up a print copy or a digital copy of the magazine below: